Wednesday, November 27, 2013

Bone Marrow & Poached Eggs

Success! I found some bone marrow. Actually I found some frozen bones labelled dog bones at the local grocery store. I asked the butcher if he had any bone marrow. The man smiled at me and said, "how long do you want them cut?" 2 inch lengths sounds good to me. 


I had already posted Fergus Henderson's recipe for bone marrow, so I didn't want to COOK and POST yet another Fergus Henderson bone marrow recipe and besides that I am not familiar with parsley as an accompaniment with bone marrow.


I also wanted to cook these little bones of deliciousness right away. Then it came to me! Why not have bone marrow for breakfast with eggs! Bone marrow in place of bacon what a way to start the day. 


Now parsley and shallots sound good to me but I could not find any shallots so I replaced the shallots with green onions.  


I was going to bake some bannock to serve with the marrow but Montana Man had ordered and bought some bannock and I was not going to post another woman's bannock, not on my blog. I bought some whole grain bread to go with the marrow and poached eggs. 


I only had one good shot to post but let me say why the hell did I wait so long to combine bone marrow and poached eggs for breakfast? I scooped out the marrow and mixed it in with the yoke of the eggs  with a sprinkle of parsley and green onion, it was the most satisfying breakfast I have had in years. 

Bone Marrow & Poached Eggs

2 inch length bone with marrow
Eggs
whole grain bread or a good loaf of crusty bread 
Flat leaf parsley 
Onions
Sea salt and pepper

  1. Pre-heat the oven to 350 degrees. Place bones in an oven proof pan. Place in oven and cook for 15 mins. 
  2. Clean and chop green onion and a few stalks of flat leaf parsley.
  3. Meanwhile, get hot water ready for poached eggs. When the marrow is cooked after 15 mins., cook your eggs and toast a slice of whole wheat bread or a thick slice of crusty bread.
Scoop out the marrow and place it on top of your poached eggs and toast, with a sprinkle of parsley, green onion, and salt and pepper. 


Monday, November 25, 2013

Vietnamese Coffee

When I decide to do something, like start a food blog, I have a tendency to jump right in without much planning and I hope for the best. I wanted to share stories and Native history through food but I decided this weekend that I need to do a bit more research and planning when it comes to this blog. I need recipes. Last night while I was snacking with Montana Man we pulled out a variety of snack foods; liver pate, pickled pigs feet, sweet gherkins, goat cheese, crackers and red grapes. While we finished up the liver pate, pigs feet and crackers the recipes started to flow.


Why don't I make my own pate, pickled pigs feet and crackers? My mother also bakes like a maniac she has a ton of cookie and dessert recipes that she has collected for over 30 years that I can use. The recipes are starting to come together; organ meats, bones, cheap cuts of meat, pig fat, canning, vegetables, snacks, cookies and desserts. What about the wild meat? That is a bit more of a challenge since Montana Man doesn't hunt, at least not this year. Game birds are also a little harder to come by and this is why I have to do more planning and research to see what is available in this area.


But the reading, research and cooking will have to wait a little longer, today I helped Montana Man do a little fence work. I am like a surgical nurse that keeps the tools organized and in one place, then hands over the necessary tools when asked. The day started out warm but quickly dropped temperature when the clouds rolled in, perfect timing. I snuck back into the house and made myself a nice sweet cup of Vietnamese coffee to warm up the cheeks and finger tips before heading back outside. 


Vietnamese Coffee
3 teaspoons of strong coffee
2 tablespoons of sweeten condensed milk
  1. In a 12oz coffee cup put 1-2 tablespoons of condensed milk in the cup. 
  2. Using a metal filter put 3 teaspoons of either Cafe Du Monde or Trung Nguyen Premium Blend coffee. Screw on metal screen (lightly). 
  3. Next place the metal filter over the coffee cup and pour hot water into the filter about 1/4 of the way, wait until water completely disappears then fill to the top with hot water.
  4. Once the water is completely gone (if you screwed on the screen to tight you may have to loosen), take the metal filter off, mix and enjoy. You can either drink it hot or pour over ice. 

Note:
If the coffee is too strong add a bit of hot water directly into your coffee cup. I also start out with one tablespoon of condensed milk, but adjust the milk to your liking. You can find these metal filters and the coffee in most Asian grocery stores, I bought mine at T&T in Calgary, Alberta. The filter I bought also came with instructions. 


Friday, November 22, 2013

A Sense of Place

I am in Great Falls today with Montana Man and his kids. Here are some pictures I have taken in 2012-2013 of the Rocky Boy area, Montana Man's horses and Havre. 


Centennial Hill
Rocky Boy, MT

Just over those hills is the Parker School District where I live with Montana Man (Rocky Boy) 


Those are the Sweetgrass Hills on the horizon.


Wednesday, November 20, 2013

Christmas List

My grandparents built their home in the 1930's on about 40 acres of land. They had a wooden stove that they used up until the 1970's when they finally replaced it with an electric stove. My grandmother baked her own bread and buns in that wooden stove. And on top of that wooden stove she made rendered fat out of beef and pork fat and we ate the cooked fat, otherwise known as cracklings. She also cooked thick slices of bacon, back then bacon was cured with the skin of the pig still on, in a cast iron pan. I remember eating those thick slices of bacon with a few short hairs of the pig still on the rind. Anyways, she used to keep the bacon drippings in a tin can.

She used to take forkfuls of this creamy off white substance, whether it was rendered fat or bacon drippings and spread it, rather thickly, onto a thick slice of her homemade bread. She would then eat her rendered fat and bread with a strong cup of tea. She enjoyed it so much I asked to try it. It was sweet. Sweet because I found out she mixed the fat with a little brown sugar. I remember her cutting up my slice of bread with rendered fat into strips that she called soldiers and she also served me with a cup of tea that had plenty of sugar and cream. Most grandmothers spoil their grandchildren with sweets but my grandmother spoiled me with render fat and bacon drippings and let me tell you there is nothing like bacon drippings with brown sugar on a slice of homemade bread.

What I am hoping to find under the Christmas tree this year is Jennifer McLagan's cookbook, Fat and


Fergus, Henderson's cookbook, The Complete Nose to Tail. 


Inside of these cookbooks are recipes that will make anyone who was raised on fat and slabs of cured bacon with the rind, reminiscent of their grandparents and the good old days. Besides that fat is good for you. You need animal fat so that you can digest your food properly, it makes you feel satisfied and you don't gain weight by eating animal fats. Animal fats are making a comeback and its about time. 


Tuesday, November 19, 2013

Bourdain and Hamilton

I have read thee of Bourdian's books, Kitchen Confidential, Medium Raw & The Nasty Bits. 


and Hamilton's memoir, Blood, Bones, & Butter.  


soon to be a movie 

Click here for details

I thoroughly enjoyed Bourdain's books and Hamilton's memoir. These books are in part the impetus for starting this blog. I have Hamilton's and Bourdian's books on Kindle and I have highlighted and made many notes that reflect my own personal experiences in the food industry as well as my thoughts and beliefs about food. It was Hamilton's childhood memories that made me realized this is what I have been wanting to write about for the past four years. I want to write about my own childhood memories of living with a hunter along the foothills of the Rocky Mountain range. 

In my opinion these are the best books that reflect why some people enter the food industry and either make it or they fail. Bourdain and Hamilton share their journey from dishwashers to chefs in a straight forward, to the point and blunt way. They don't glorify the life of being a cook but they share what they love about cooking that lead to their success as chefs and writers. 

I didn't make it in the industry because I never really wanted a career as a cook and I never had dreams of owning my own restaurant. I was in high school when the school councilor suggested that I look at a career in the food industry and suggested I should waitress that I was pretty enough to make good money in tips because, "Indians don't do well in university."And that's what I ended up doing for several years.

When I entered into the food industry I was 19 and I stayed in the industry for 12 years. Throughout those years while I was waitressing and later cooking, I managed to upgrade some high school classes and attend 3 post-secondary institutions. I was eventually successful and completed an Education degree which finally ended my career in the food industry. Two years ago I completed a Masters degree in curriculum development and now I want to write a food blog. I have learned a great deal about myself, my childhood, my connection to the Rockies, my cultural roots and I really do like eating good food and cooking, just not professionally. I also proved my high school councilor wrong, I did do well in university. 

I highly recommend these books, especially if you have ever worked in the industry and like good entertaining and insightful reading about life behind the scenes of any restaurant. 


Monday, November 18, 2013

Bannock

Click here for recipe

I was never taught to bake bannock by my mother or grandmother. It was a Cree man who taught me how to bake bannock. He took a coffee cup and that's what we used to measure out the four and water. Next he used the palm of his hand to measure out the salt and sugar and a fork for the baking soda. He made a well in the middle of the flour, poured in the water and then ever so slowly using his wrist he combined the flour with the water. Once it all came together in a large lump, he dumped it on a cooking tray and shaped it into a circle then he pressed down on the bannock to evenly flatten it out. We cooked the perfectly round shape of dough for 40 minutes. He suggested that if I ever had any rendered fat to add a couple of fork fulls to the flour mixture and work it in as if I was making pastry before adding the water. I have been using his recipe and method for baking bannock for 15 years with great success.

But let me say this...bannock is NOT a"traditional" Native American food item although, Native Americans across North American have acculturated this Scottish/Irish invention as their own and its either baked or fried. I have attended many feasts were its not a feast unless there is bannock. Its rather humours because bannock is presented and served to tourists as Native American "traditional" food.

For the purposes of this blog bannock is a symbol and its about our historical relationships with Europeans as well as the influences of European food and ingredients have had over Native cultures across North America. Bannock is about how these the new ingredients and cooking methods from Europe have been acculturated and how these ingredients such as refined flour and sugar have impacted our communities today.

Sunday, November 17, 2013

Bone Marrow

image found 

Maybe I should explain the bone marrow in title of my blog. I grew up eating every morsel of meat, fat and cartilage off the bone. I did that because my step-father was a hunter and did not like anything that was good for you and edible to be left on the bone. I once watched my step-father take a hammer and chisel to the leg of a deer bone just to get at the marrow. We ate the brownish jello like substance with just a little sprinkle salt and a big bit of home baked bread.

image found

Simply put bone marrow is comfort food and a reminder of simple cooking and living self-sufficiently. 

Edited November 21, 2013

Fergus Henderson's 
Bone Marrow and Parsley Salad

3-4 inches of bone marrow bones
1 cup of parsley 
2 shallots
2 tablespoons of extra virgin olive oil
1 tablespoons of capers
1 tablespoon of lemon juice
sea salt and pepper 
Rustic white bread cut into thick slices
  1. Preheat your oven to 450 degrees place your bones in a roasting pan and cook the bones for about 15-20 minutes, depending on the thickness of the bones. The marrow will start to separate from the bone. (What they don't say in the recipe if you over cook the bone marrow a bit, don't worry there is a use for that excess fat in the bottom of your roasting pan and I will tell you why later.) 
  2. Chop the parsley, but still in big pieces, chop your shallots and combine with the lemon juice and olive oil and season with sea salt and pepper. 
  3. Toast your bread 
Once your bone marrow is cooked: spread your marrow on a thick slice of toasted bread, with a sprinkle of sea salt and some parsley salad. I don't use parsley salad just a bit of sea salt but the bread is important so make sure its the best rustic bread you can find. 

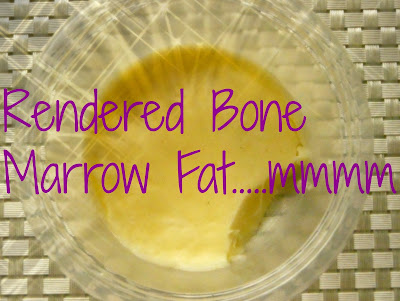
Now if you accidentally overcooked your bone marrow and you now have a roasting pan full of rendered bone marrow, don't worry that fat can be used. Last month my mother found some bone marrow at the local grocery store (they are hard to find) and brought them home. I had slightly over cooked the bones so I poured the excess fat into a container. The next morning I cooked my eggs in a bit of marrow fat. Bone marrow fat is has a distinct but mellow and delicate flavor and I felt so satisfied afterwards. So don't waste whats left in the roasting pan.